Track Tour Episode 1: Circuit de Spa-Francorchamps (1967 edition)
Last year I went on a business road trip to Germany. On the way back I quickly stopped by several classic tracks close to my return route (some of them now partially or fully abandoned).
One of them, as you may have guessed by the title, was the belgian track of Spa-Francorchamps.
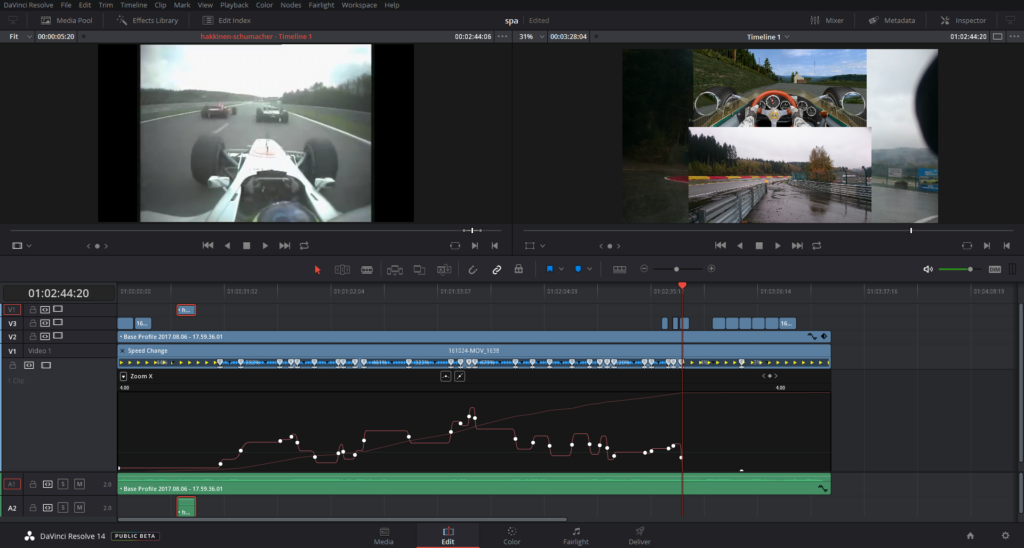
I wanted to make a quick comparison video of some race simulators to the real thing. So here I am, months later, having finally decided it’s about time I learn how to edit videos. I initially tried the open source software OpenShot. Unfortunately, I found too many bugs related to speed adjustment, which was absolutely required to synchronize my driving with the fastest F1 replay.
Eventually, I had to settle with the non-free non-opensource DaVinci Resolve:
To create the subtitles I used Subtitle Edit. I guess I could have used Youtube’s built-in subtitle editor too.
And here’s the resulting video.
It could definitely be improved, but I’ve ran out of Sunday afternoon already:
HTML5 + Box2D = Quick’N’Dirty Dakar Rally Sim
I very rarely mess with web development these days, but the power of current JavaScript engines and latest HTML5 features were just too juicy to pass on.
So sometime around early 2011, I took two afternoons and played with these technologies. Just now I remembered the project I had in hands, and decided I could give it a name and publish it on the net for your personal amusement.
Consider it pre-alpha, and expect bugs! 🙂
Features:
- Infinite landscape, using procedural generation (how else could I squeeze infinity into a few KBs?), and adaptive terrain features based on play style (namely, how fast you like to drive).
- Somewhat realistic physics (based on Box2dJS library).
- Incredibly detailed graphics engine based on WebGL. Nah just kidding, it’s the default HTML5 canvas-based rendering provided by Box2D itself…
- Physically-modelled rolling stones on the driving surface. Framerate suffers too much so they’re disabled by default. To re-enable, dive in the source code and hack away.
- Tested on major PC browsers, and on Dolphin Browser Mini on Android.
Controls:
- right-arrow -> gas
- left-arrow <- brake
Right now I’m in the middle of a physical home migration so the code is not githubbed yet, but you can access it by clicking the following link:
Quick’N’Dirty Darkar Rally Sim 2011
There’s no purpose as of yet, but you can try to race against the terrain and see how far you last before ending up on your roof or suffering a physics explosion.
License is GPLv3.
04.3.09Ladies and gentlemen, may I introduce you…
Just a small vid (edited by Silverghost) of the first day of my new baby bimmer, a 118D 5d. More info, pictures and a thorough review coming soon!
Un montaje (editao por Javi) del primer día del peque, mi nuevo 118D 5p. Otro dia con más tiempo le hago una review en plan, con foticos y esas chorradas 🙂 .
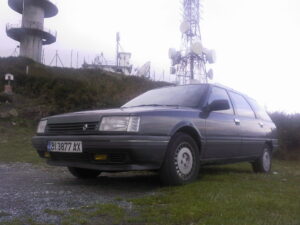
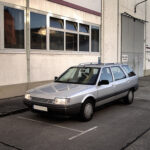
En efecto, éste es el digno sucesor elegido para el viejo Renault 21.
So yeah, that’s the worthy replacement for the now sadly defunct Renault 21.
03.27.09Y ocurrió lo inexorable
Algún día tenía que pasar, y ese día ha sido hoy. He perdido uno de mis compañeros de infancia.
Han sido dos décadas de arañar los curvados arcenes entre recta y recta. De seis mil engañosas revoluciones bajo una carrocería ya vetusta. De puertos, rotondas, acantilados, baches, sinuosas secundarias, callejuelas, autopistas interminables, aparcamientos imposibles. De sufrir a corazón abierto nuestros experimentos audiotuneros. De aguantar como un campeón agonizantes repiqueteos a doble cilindro por llevar media tonelada de personas y equipaje a traves de cientos de kilómetros bajo los insidiosos soles veraniegos.
Barca, brunibús, funeraria, ranchera, papamovil, coche fantástico, brunimovil, el coche de la fiesta… Cada uno te recordará con un nombre, pero ninguno te olvidará (y al que lo haga, que le zurzan el tercer ojo xD).
Venga va, tampoco nos emocionemos mucho, que el reemplazo está coming muy soon akí mismo! Ya habrá hay noticias por estos lares muahahaha! 😈
03.8.09Mad oversteer
Some old vids in which I’m just the wheelman. Thanks to Darth Joules and Geert, the simracers who did the video capturing and editing (my crappy 1k ghz putter couldn’t handle all that stuff, 30 constant FPS was already a great achievement), and of course thanks to Eero Piitulainen for the excelent RBR physics (hope to see another physics engine of yours soon…).
Ahora lo que es en castellano: un par de viejos videos, de cuando solía quemar rueda (virtual) semanalmente, en este caso con RBR. Gracias a Darth Joules y Geert por la captura y edición, y Eero por el brutal motor físico que programó a contrarreloj para SCi y que aún hace vibrar a la comunidad. Una pena que el código se haya perdido en el limbo legal gracias a los 6 años de abandono, los Ferraris de dudosa legalidad estrellados, la mierda que salpicó a Warthog Studios por sus relaciones con cierta mafia sueca de blanqueo, las detenciones de algunos CEOs y los consiguientes enchironamientos, y weno… mejor no seguir que escribo un libro 😆
Richard Alexander Burns
January 17, 1971 – November 25, 2005
R.I.P.
12.1.08Bricotuning de audio para un Renault 21 Nevada – part 3
(…continuación de la parte 1 y 2)
Hola amigos atuneros! Me estaba dando pereza, pero por fin llega el tercer y último bricotuning de la serie! Voy a intentar no alargarme mucho, que ya está bien de tanto párrafo pa unos simples altavoces. 😉
Cableado del coche
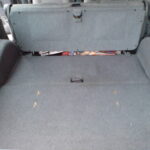
Debido al lugar donde se iban a colocar los altavoces, nos pareció más comodo tirar cables desde el salpicadero hasta el maletero por los bajos interiores de las puertas.
Lo primero fue pinchar los canales traseros justo antes del conector universal. De esa forma, los woofers son independientes del loro elegido, por lo que en un futuro se podrá cambiar sin complicaciones.
Fue un poco complicado pasar los cables, así que no quiero ni imaginar las virguerías que hará falta hacer en un coche moderno…
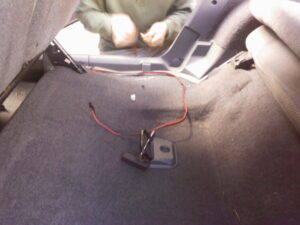
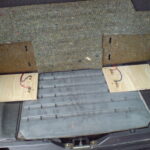
Metimos con cuidado cable resistente por cada lateral del coche (uno por altavoz). Van por debajo de las cubiertas de plástico, como se puede intuir en la foto, de forma que no quedan a la vista.
Por suerte, el Nevada es amplio y sus 3 filas de asientos tienen mucha movilidad, asi que no tuvimos problemas para pasar los cables.
Montaje de los soportes y detalles finales
Para evitar cortos e incendios varios, los soportes de altavoz fueron hechos también de madera, a la cual atornillamos los hembras correspondientes a cada altavoz.
Dichos soportes fueron a su vez atornillados a la tapa que da acceso al compartimento de la rueda de recambio. De esta forma, se puede seguir accediendo facilmente a dicha rueda y herramientas cercanas.
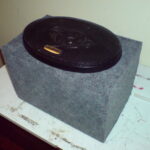
Finalmente, compré tapicería de un gris adecuado por unos pocos lerus, y con cuidado forramos ambos altavoces.
Como una imagen vale más que mil palabras, aki tenéis 5000 y pico palabras: 🙄
Una vez estuvo todo en su sitio, di un paseillo al R21 para ver si los altavoces aguantaban al pasar por baches. Todo fue perfect a la primera, asi que no tuve ni que ajustar los muelles de los enganches.
Aparte, retoqué el bias para que los 4 altavoces saturasen a la par con los géneros musicales y ecualizaciones que suelo montar, evitando así quemar los dos delanteros al ser el cuello de botella.
Bonus final
Como premio por haber leido todas las explicaciones, os pongo un videocumental que montó Javi tras hacer de paparazzi aquel finde. Por desgracia, la mierda de calidad de youtube no permite apreciar los graves que saca el equipo, pero os aseguro que es más que suficiente para ese habitáculo 😀
Bricotuning de audio para un Renault 21 Nevada – part 2
(…continuación de la parte 1)
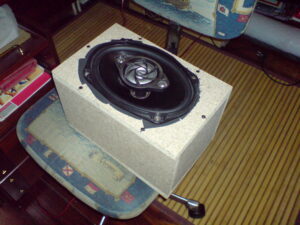
Como iba diciendo, estabamos con el diseño de las cajas. Se hicieron bastante profundas para darle más graves al asunto, que es lo que me interesa. Si me diera igual, las cajas podrían haber sido un poco mas pequeñajas y manejables. He aquí algunas capturas del proceso de fabricación:
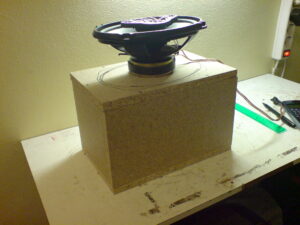
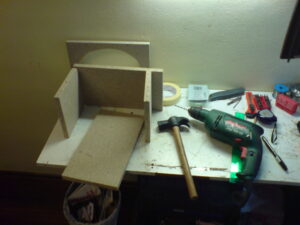
Atornillamos las tablas entre sí sin ninguna complicación. Después metimos pistola termofusible por el interior de todas las aristas, además de unas hojas adherentes de esponja negra fina en el óvalo donde luego meteríamos a hostias cuidadosamente el altavoz.
El objetivo no es otro que mejorar la hermeticidad de la caja, con la consiguiente mejora en calidad de sonido que teniendo en cuenta dónde se escuchará (en un coche, y además viejuno!), únicamente los audiófilos podrán apreciar 😆 . La cosa quedó tal que así:
Y ahora la parte interesante: el conector de audio y el anclaje de la caja al coche. Los requerimientos son varios:
- Poder utilizar el maletero completo si hace falta.
- Que el conector de audio sea resistente a los meneos que sufrirá con el equipaje yendo y viniendo.
- Que el sistema sea (des)montable en menos de un minuto.
- No necesitar herramientas para el montaje: nada de llaves allen, ni navaja, ni alicates…
- Que sea, además, bonito y barato, por supuesto!
Estuvimos barajando muchas posibilidades. La mayoria descartadas por ser muy caras (por ej. audio enviado por wifi/bluetooth), muy blandengues (por ej. jacks de audio típicos), y muy warras (por ej. dejar conector y cable con holgura, para que no sufran tirones).
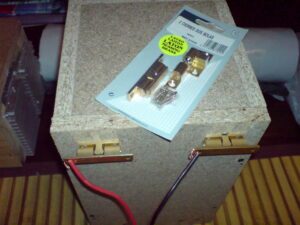
Por suerte, como programador que soy tengo la costumbre de intentar eliminar redundancias, y se me ocurrió una idea que cumplía todos los requisitos. Para llevarla a cabo necesitaba un conector poco convencional, que no se puede encontrar en tiendas de audio, como veréis a continuación:
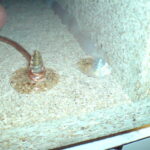
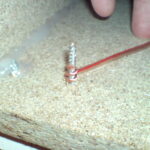 Comprobamos la conductividad del material elegido con un tester y altavoces.
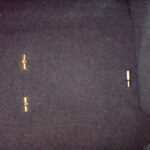
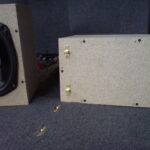
Atravesamos la base de la caja con dos parejas de tornillos.
Utilizamos de nuevo la termofusible para fijar los cables tierra y positivo a sendos tornillos.
¿Y qué es lo que va al otro lado de estos 4 tornillos? Esto:
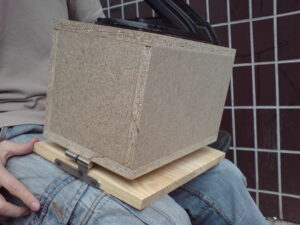
En efecto: para qué utilizar un mecanismo para el anclaje del altavoz, y otro diferente para la conexión de audio, cuando podemos utilizar el mismo para ambos? Con un par de simples cierres de puerta y una visagra solucionamos el problema.
Nota: se podría haber tirado corriente eléctrica por la visagra en vez de utilizar un segundo cierre, pero entonces el anclaje quedaría un poco inestable. Así que finalmente decidimos usar esos 2+1 anclajes.
Weno gente, creo que es suficiente por hoy, que ya me he cansado de escribir y subir fotos 😉 , así que otro día continuaré con el brico.
Coming soon: cableado y bricolaje en el Renault 21 – Parte 3!
09.22.08Status of Logitech G25 support under GNU/Linux
Last time I tried the Logitech G25 steering wheel under GNU/Linux, only two of the 7 gears could be used, there was no clutch pedal, gas and brake were in combined axis mode, a couple of buttons didn’t even work, the steering range was severely limited… long story short, there was no way to fix all those problems, so the wheel was definitely not usable for simracing purposes.
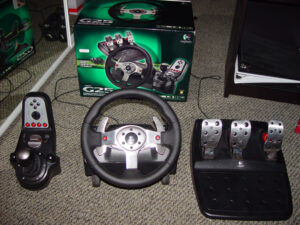 Fortunately, a few days ago I stumbled upon a thread discussing the usability of the wheel under GNU/Linux, and someone had kindly posted some links to the VDrift forums (great sim btw), where most of the previous discussions regarding the G25 had been held. It seems that some guy had released a tool that allows to use all the features of this awesome steering wheel.
Skimming through its code (yeah, it was realeased in source code form, under public domain and LGPL!), it seems to send some binary data that initializes the so called extended mode, which is not enabled by default. It looks like someone has spent some serious time sniffing through USB traffic…
Anyway, the thing is that the tool does work, and so the G25 is now much more usable under GNU/Linux! Except for one thing: trying to set the 900º rotation mode, a process during which some usb or hid driver seems to freak out and remove the steering wheel device nodes 🙁
Force feedback is supposed to have been working for some time now, but due to the aforementioned initial problems, I never really bothered to test it much (I did patch the kernel to see if the existing FFB drivers would work for the G25, and the basic effects worked, but there was no point on finding a driving game that used them).
Just in case it disappears from tha interwebs, i’m hosting the tool myself. The usage is pretty simple:
- Download the GNU/Linux Logitech G25 extended mode enabler tool (46KB) archive.
- Extract its contents anywhere, and cd to it.
- Compile: ./build.sh
- Run the tool: ./usbtools g25-set-extended-mode
And that’s it. Make sure you run jscalibrator the first time in order to calibrate and remove any nasty deadzones on all axis. For more info, simply run ./usbtools without parameters.
Now i just gotta wait for Wine to properly support forcefeedback so that i can enjoy Live For Speed the way it’s meant to 😀
Happy racing!
09.17.08Bricotuning de audio para un Renault 21 Nevada – part 1
Tal como prometía hace unos días, aquí llega la primera parte del bricotuning de altavoces traseros en mi R21.
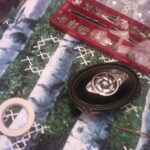
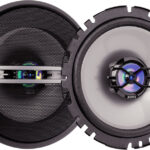 Hace ya unos cuantos meses me cayeron del cielo un par de altavoces de 80w rms cada uno (foto derecha). En casa ya tengo suficiente equipo como para que se quejen los vecinos, asi que investigué si podía meterlos en el coche, un R21 Nevada (familiar).
Delante tenía casi recién montados unos Sony XS-F1725 (foto izquierda), que suman 80 watios rms, asi que los 160w adicionales tenían que ir detrás, para dar un poco de apoyo en bajos.
Sumado, el equipo final necesitará picos de 240w, y el equipo Sony CDX-GT414U que tengo montado provee un máximo de solo 200w. Investigué un poco el tema en internet, y viendo cómo nadie se pone de acuerdo sobre infrapotenciación/sobrepotenciación, decidí pasar de etapas e historias, y montar los altavoces a pelo. Con tener un poco de cuidado y oído, no debería dañarse ni el preampli (por exceso carga) ni los altavoces (fundiendo las bobinas por meterle ondas cuadradas tras el pseudoclipping del preampli).
Así que manos a la obra, me bajé del emule unos cuantos planos del coche, con detalles sobre todas las piezas: chasis, carroceria, interiores, etc.
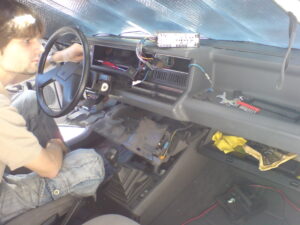
Entre la pésima calidad de los pdfs y mi vagueza de revisarme cientos de planos, decidi subir el coche a Artxanda y abrirlo junto con un colega, Javi, para comprobar visualmente dónde meter los woofers. Desmontamos medio maletero, descubriendo que:
- El hueco cuadrado del chasis a la altura del pilar C es muy pequeño.
- El pilar D no ofrece ni un solo resquicio para poner nada, logicamente.
- La asimetría del chasis por la tapa de combustible arruina cualquier posibilidad de empotrar el altavoz en huecos posteriores al paso de rueda (a menos que pongas cada woofer mirando pa un lao, claro xD).
Dado que me iba a tocar montar los altavoces restando espacio al habitáculo, tenía completa libertad en cuanto a forma y tamaño de las cajas. Me junté de nuevo con Javi (que me ayudo mucho con todo el proyecto en general, gracias tio!), y decidimos unas medidas adecuadas a los altavoces, dando prioridad a los bajos. Lo siguiente fue ir de compras:
El proceso de montaje de las cajas, que como veréis son un poco especiales, lo detallaré en la segunda parte 😉
Stay tuned!
05.13.06
Realistic Fractal Worlds
As you may or may not know, I’m involved in a pretty ambitious project, named Motorsport. Its purpose is to become the most realistic simulator of vehicles (usually cars), and as such, no ideas are being scrapped (as long as they contribute to the sim realism, that is).
There are a lot of ideas floating around. You can read about a couple of those new ideas here. However, I’m going to talk about something which you won’t find there: generation of real world 3d geometry and textures on the fly, with an unlimited level of detail.
Yeah, sounds gorgeus at first. But it’s not so gorgeus as it’s difficulty to code and get right (i guess).
The idea is to:
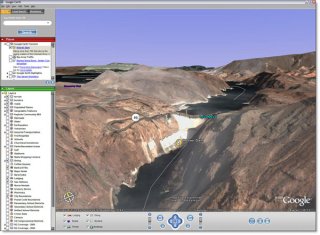
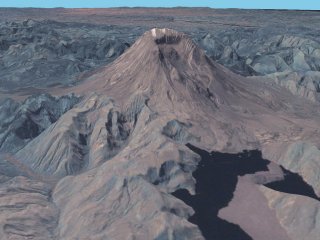
- Find a free (CC-licensed if possible) source of Earth data. We need both 2d textures and a 3d model, which can usually be found in the form of (unfortunately) freaking low-res textures and freaking low-res heightmaps.
Possible sources:Ok, so that has nothing to do with fractal worlds.
- That’s where procedural contents come into play. Take a library such as LibNoise, take the aforementioned freaking low-res contents, mix them all in a bowl on the fly, and you can get 3d meshes and 2d textures with any level of detail you may want, perfectly consistent and reproducible across different computers.
- But this is a vehicle sim, so we must add some roads.
Google Maps provides some road maps (as do many other websites such as Guia Campsa, but their data most probably can’t be used without paying royalties first)
Then there’re some professionals who work creating landxml-compatible sets, which sometimes are not even possible to buy.
And then there’s data created by regular people with their GPS-equipped cars, for example Open Street Maps.Once we got some good (or bad) road data, we drop it over the heightmap we got from point 1), seamlessly integrating it by using 3d mesh data and blended textures, and add some detail (bumps, side bankings, curbs, dust, camber, variable surface properties, …) in order to make the ride a bit more interesting.
Sounds easy, does it? Of course NOT. But it’s just a rough idea of what could be done in, say 23 years or so.. give or take a day 😉
Enough dreaming for now, I should go study something about OSs (Operating Systems, not Open Source Software! 🙂
See ya!
Ps: yup, I’ve finally decided to write some posts in English, as I find it easier to find the words for technical subjects such as the one in this article. Plus English is a more efficient language when it comes to bandwidth! 😛


