Hacking the LGA 775 socket
Hello, and welcome to CPU Dealers!
In todays episode we’re going to learn how to fit an LGA771 CPU into an LGA775 motherboard with no brute force!
Motivation
So why on earth would anyone decide to put an LGA771 Xeon server cpu into a domestic LGA775 motherboard, you may ask?
Welp, because it’s fun and you get to learn stuff, thats why!
Traditional motivation: Money
However, the usual argument is that, if you are planning a modest upgrade for your shitty old LGA775 system, not needing the latest and greatest, you can save some money this way. See, there’s lots of Xeon processors in the market right now, and they are all dirt cheap. The interesting thing is that most LGA775 CPUs have Xeons equivalents:

The Xeon I chose, an E5440 SLBBJ. Same speed as a Q9550, but requires less juice, so has a lower TDP. Source: here and there.
Some people argue that Intel simply bins Xeons better than the consumer counterparts, so while being essentially the same CPU, the Xeons are more reliable, run colder, and are harder, better, faster, stronger.
The LGA775 market, on the other hand, is filled with pretty expensive CPUs. They’re all usually priced 30€ to 150€ higher than the server versions: Xeons are definitely the best bang for the buck. So the plan usually is:
- Upgrade your system to a Xeon instead of a domestic CPU.
- …
- Fun and profit!
Side motivation: Overclocking
Some people take advantage of the lower voltages required by Xeons, and choose them not only because they’re cheaper, but because it’s in theory easier to squeeze a bit more speed out of them.
Keeping that in mind, I chose an E0 stepping (later revisions usually lower power requirements of the CPU). Unfortunately, my SLBBJ unit was already running pretty hot at stock voltages and clocks, so I’m leaving it alone for the time being.
Background
LGA775 (codenamed Socket T) was introduced by Intel around mid-2004, and used in domestic motherboards. The most popular CPUs running those LGAs are now Core2Duos and Core2Quads.
A year and a half later, in 2006, Intel introduced LGA771, a very similar LGA intended for use in multiprocessor server motherboards, and which can host Intel Xeon processors.
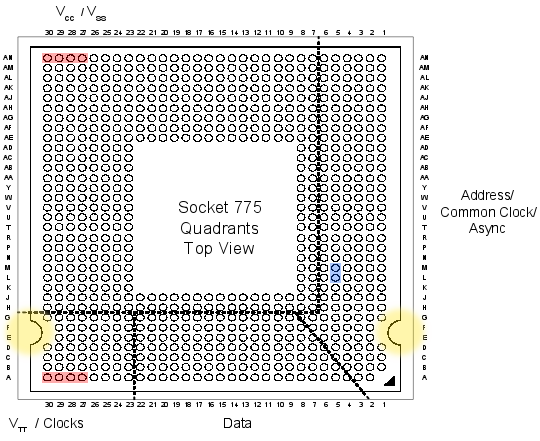
Looking at the official datasheets released by Intel (page 41 here and page 52 here) , we can check the pinouts of both LGAs, and spot their differences:
If we checked the socket pin assignment one by one, we could see that there’s 76 different pins in total. But most of them are irrelevant (reserved for future uses, etc), they pose no problem for our conversion mod, so we’re left wondering about the colored pins:
- Red: 8 pins only used in LGA775.
- Green: 4 pins only used in LGA771.
The red and green pins are all power pins (VCC, VSS at the top, and VTT at the bottom). There’s hundreds more of them in the LGA, so I’m sure our new CPU won’t mind if we remove just these few.
- Blue: 2 pins that have different purposes in each LGA.
These pins (L5 and M5) serve different purposes in LGA775 than in LGA771. And this time they are important pins (one of them is the Execute BIST pin, Built-In Selft Test, needed to boot). Fortunately, Intel had simply swapped their places in the newer 771 LGA! So it should be relatively easy to re-wire them.
- Yellow: not a pin, just highlighting the different shapes 🙂
These differing yellow shapes can be a problem, since the CPUs from one LGA will not physically fit in the other LGA without some hardware modifications. We’ll get to this later on.
Uh, in case you’re wondering, I did not personally go over all the pin specifications one by one. But this guy did.
Motherboard support
In most cases, the CPU will run as-is. This was the case of my 965P-DS3 motherboard.
Sometimes, you may need to manually patch your BIOS, adding the microcode of your specific Xeon model to the internal “whitelist” (so to speak). Additionally, this usually forces your mobo to acknowledge that your Xeon CPU implements the SSE4 instruction set (which can give an extra speed boost in some applications).
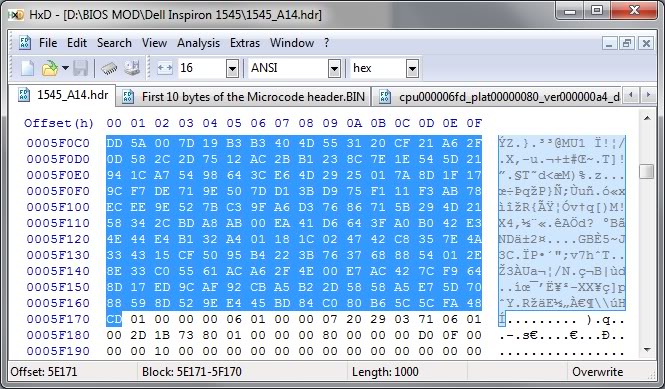
I didn’t patch my BIOS just yet… so instead, I decided to steal this screenshot from Google Images. Sue me.
And in a few rare cases, your motherboard will directly refuse to boot the new CPU, regardless of any BIOS patching you may attempt. In that case, you’re out of luck.
Before attempting to transform your LGA775, search the web and check if your chipset will be happy with a Xeon CPU.
In any case, bear in mind that your mobo needs to support the speeds that your specific Xeon choice requires: voltage, FSB speeds, etc. Otherwise you’ll have to resort to underclocking the CPU (sad), or to overclocking your motherboard/ram (yay! but not recommended).
Procedure
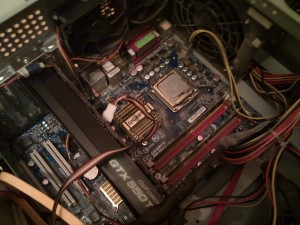
First, open your tower, remove the heatsink, then the CPU:
Now we do what the title says: we hack the LGA775 socket. Literally.
Yes, take a sharp knife or a cutter, and prepare to slash some plastic. The exact bits you have to cut off are the ones colored yellow in the LGA775 pinout diagram (scroll back to the beginning of this post). It should end up looking something like this:
The motherboard is ready!
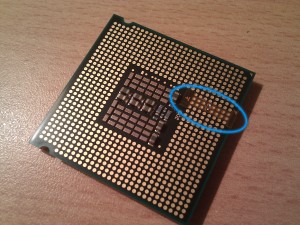
Now we need to hack the Xeon CPU itself. Remember the blue pins that had switched places in LGA771? It’s time to revert what Intel did, and get a 775-compatible pinout layout.
If you’re good enough you could try to swap them yourself, using whatever technique you come up with. But the rest of us mortals will resort to buying a ready to use swapper sticker. Search for “775 771 mod” in ebay, play safe and buy several of them, just in case you break one in the process:
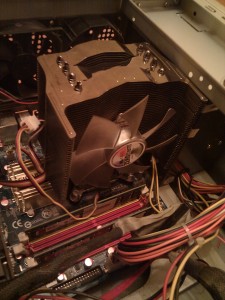
So there’s that. Now we simply have to put the Xeon in the LGA, add thermal paste, heatsink, etc:
Finally, plug the PSU, pray to Flying Spaghetti Monster, and boot the system!
Results
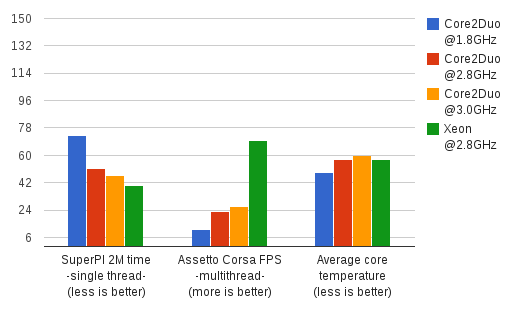
Here’s a nice comparison graph of the results. The contenders are:
- A Core2Duo E4300 (LGA775), at speeds ranging from 1.8GHz (stock) up to 3.01GHz (overclocked).
- A Xeon E5440 (LGA771), at stock speed (2.83GHz).
The benchmarks are:
- Assetto Corsa, a multithreaded racing simulator (M30 Gr.A Special Event), FPS measured with my own plugin FramerateWatcher.
- PI calculator SuperPI, 2M variant, running in a single thread.
- Average maximum temperature reached by all cores, over a period of 15 minutes running In-place large FFTs torture test in Prime95.
The winner is the Xeon, as it should: specially in multithreaded programs, the Xeon obliterates the Core2Duo.
But it’s interesting to note that, even running at the same clock speed of around 2.8GHz, the Xeon outperforms the Core2Duo by more than 20% in single threaded applications.
I checked the FSB and RAM multipliers in both cases, just in case the Xeon had an advantage on that front, but it was actually the E4300 which had higher FSB and RAM clocks!
Goes to show how clock isn’t everything when it comes to performance, and obviously better CPU technology consists of more than higher clock freq and greater number of cores.
The end
So that’s it, that’s the story of how I more than doubled the framerates in games and halved compilation times for the cost of 4 movie tickets.
Hope you enjoyed reading this article as much as I definitely did not enjoy proof-reading it! 😉




August 22nd, 2014 at 03:57
This guide is fantastic. I have had an aging Dell Vostro 400 small business server since 2008. When I first got it, it was a BEAST. I could play ANYTHING at ultra high settings… but over the last few years, it has shown its age. I was going to get a new motherboard, ram, and an i7 and I happened to notice a xeon processor being sold on ebay that said “modded to fit 775 architecture” and I was like “huh?”
Did some research and found your page and ordered one for $46 bucks on eBay. I had been looking at some of the newer core 2 extremes but they were $300+! I could have gotten an i5, new mb, and 8gb of ram for that much… So glad I found this mod.
April 9th, 2015 at 23:33
What revision number is your 965-DS3?
October 23rd, 2015 at 02:41
the picture with the printout of 771 and the picture with the actual Xeon pin pads with the adapter sticker attached do not seem to line-up to me.
the alignment triangle is not in the same place on both pictures.
is anyone able to verify which is the correct placement of the adapter sticker?
or am I missing something in those pictures?
October 23rd, 2015 at 08:40
@jinxterx it was the latest revision, 3.3 if i recall correctly (i have given that computer away so I can’t check)
@newmodder the pinout displays the motherboard side (not the cpu side). The corner marker on the cpu itself may seem like a different place, just like *your* right side is *my* left side if we faced each other… not sure if that’s what is confusing you.
April 20th, 2016 at 05:09
Great that I chanced upon your site,Buddy…was thinking of how to upgrade providing that my budget is tight…two doubts to clarify, I have a Gigabyte LGA 775 Socket T Ga 8aenxp D Board and a P4 640 3.2ghz chip….does the BIOS need to be patched and most importantly,can this Board be hacked to run the Xeon Chip?
Awaiting for your reply asap.
April 20th, 2016 at 12:31
@woodenmetal unfortunately I have no idea, only have experience with my motherboard model
May 2nd, 2017 at 12:28
Cool manual. Thanks for submitting!
In single-threaded applications the 45 nm Core 2 CPU’s have about 10% better single-thread performance. If you add 3 times more cache (6 MB vs 2 MB per two-cores), you get 20% better single-thread performance. Now you have 2 times more cores, so the performance increase is incredible 🙂
January 22nd, 2018 at 08:52
Interestingly a lot of LGA775 boards are showing up NOS, back in the day they were simply stored.
So if you wanted to run a low end media server this would be fine, the whole setup would be in the £70 range and still cheaper than a basic AM4/Ryzen or Core i9 setup.
August 1st, 2019 at 18:07
Hi!
I was wondering, those free(red, unused s775) pins when using s771 xeon could be broken and xeon would still work?